Session 02
Describing Structure to AI
AI-Assisted Vibe Coding for Beginners
What Do You Want on Your Page? Just Describe It!
Quick Recap: Session 01
- ✅ You created a complete webpage using AI
- ✅ You saw HTML, CSS, and JavaScript in action
- ✅ You learned the "Vibe Coding" approach
Today: We zoom into HTML - the skeleton of every webpage
HTML = The Skeleton 🦴
HTML describes WHAT content is on your page
Think of it like organizing a document:
- "This is a title"
- "This is a paragraph of text"
- "Here's a list of items"
- "Put an image here"
You describe it → AI writes the code!
Structure vs Style
🦴 HTML
WHAT is on the page
- Titles & headings
- Paragraphs
- Images
- Links
- Lists
🎨 CSS (Next Week!)
HOW it looks
- Colors
- Fonts
- Spacing
- Sizes
- Animations
Today: Focus on STRUCTURE. Next week: Make it BEAUTIFUL!
Types of Content on a Page
When describing your page to AI, think about what types of content you need:
How to Describe Content to AI
Instead of learning code syntax, just tell AI what you want!
| You Want... | Tell AI... |
|---|---|
| A big title | "Add a main heading that says..." |
| Some text | "Add a paragraph about..." |
| A picture | "Include an image of..." |
| A clickable link | "Add a link to [website]" |
| A list of things | "Create a bullet list of..." |
You describe → AI codes → You get results!
AI Does the Technical Work 🤖
When AI generates a webpage, it creates all the technical structure automatically:
← AI sets up the page info
← AI adds the title for the browser tab
Your content goes here! ✨
- Your headings
- Your paragraphs
- Your images
← AI closes everything properly
You focus on the content. AI handles the code!
Your Job vs AI's Job
✅ Your Job
- Decide what content you need
- Describe it clearly to AI
- Provide the actual text/info
- Review the result
- Ask for changes if needed
🤖 AI's Job
- Write the code correctly
- Structure it properly
- Handle technical details
- Follow best practices
- Make changes when asked
🛠️ Hands-On Activity 1
Create an "About Me" Page
Goal: Describe what you want → AI creates it → You have a webpage!
Your page will have:
- Your name as a big title
- A paragraph introducing yourself
- A list of your hobbies or interests
- A picture (placeholder is fine)
- A link to a website you like
Step 1: Describe Your Page to AI
Create an "About Me" webpage for me:

My name is [YOUR NAME]

About me: [Write 2-3 sentences about yourself -
your family, work, interests, anything you want to share!]

My hobbies/interests:
- [Hobby 1]
- [Hobby 2]
- [Hobby 3]

Include a placeholder image for my profile picture.

Add a link to my favorite website: [URL]
Fill in the brackets with YOUR information!
Step 2: Copy, Save, and View
- Copy the HTML code AI gives you
- Open Notepad (or any text editor)
- Paste the code
- Save as
about.html - Double-click the file to open in your browser
🎉 That's it! You just made a webpage by describing what you wanted!
Step 3: Want Changes? Just Ask!
Not happy with something? Tell AI what to change:
- "Make the title bigger"
- "Add another paragraph about my family"
- "Add more items to my hobbies list"
- "Change the link text to say 'Visit my favorite site'"
💡 Vibe Coding Mindset: Describe what you want changed. AI updates the code!
Reading AI's Output 👀
You don't need to understand every detail - just look for YOUR CONTENT:
John Doe
← Your name shows here!
Hi, I'm John...
← Your paragraph text!
- Coffee
← Your list items!
- Hiking
My Site ← Your link!
See YOUR content between the angle brackets? That's what matters!
What to Look For
✅ Things between > and < = Your visible content
✅ Quoted text in links = Where links go (href="...")
✅ Image source = Where pictures come from (src="...")
Quick Check: Does it show YOUR text correctly?
- Yes → Great, move on!
- No → Ask AI to fix it!
🛠️ Hands-On Activity 2
Create a Recipe Page
Goal: Describe a recipe → AI creates a structured page!
Think of a favorite recipe with:
- Recipe name
- Short description (why you love it)
- Ingredients list
- Step-by-step instructions
- Cooking time info
Describe Your Recipe to AI
Create a recipe webpage for: [RECIPE NAME]

Description: [Why is this recipe special? 1-2 sentences]

Prep time: [X] minutes
Cook time: [X] minutes
Servings: [X]

Ingredients:
- [ingredient 1]
- [ingredient 2]
- [ingredient 3]
(add more as needed)

Instructions:
1. [Step 1]
2. [Step 2]
3. [Step 3]
(add more as needed)

Add a placeholder image for the finished dish.
View Your Recipe Page
- Copy AI's code
- Save as
recipe.html - Open in browser
- Share your recipe with a neighbor!
💡 Want to add more? Just ask AI:
- "Add a section for chef's tips"
- "Add a nutritional info section"
- "Add related recipe suggestions"
Something Not Working? 🤔
Just tell AI what's wrong - let AI fix the code!
Example:
My page shows [problem].

Here's the code: [paste code]

Can you fix it?
Common things to describe:
- "My picture isn't showing"
- "My link doesn't work when I click it"
- "The text looks weird / all on one line"
- "Everything disappeared"
You don't fix code - you describe the problem. AI fixes the code!
Better Descriptions = Better Pages
The more detail you give AI, the better your page!
❌ Vague
"Make me a webpage"
✅ Specific
"Create a webpage about my dog Max with his name as the title, a photo placeholder, 3 fun facts as a list, and a link to a dog training site"
Pro Tips for Describing to AI:
- List ALL the content pieces you want
- Mention images and links specifically
- Say what order things should appear
- Include the actual text if you know it
🚀 Share Your Page With The World!
Your HTML page works locally... but what if you want to share it?
Right now: Only you can see your page (it's on your computer)
Goal: Put it online so anyone with the link can see it!
This is called "deployment" or "hosting"
Free Hosting Options for Beginners
| Service | Difficulty | Best For |
|---|---|---|
| Netlify Drop | ⭐ Easiest | Quick sharing (drag & drop!) |
| GitHub Pages | ⭐⭐ Easy | Long-term projects |
| Vercel | ⭐⭐ Easy | Modern web apps |
| Cloudflare Pages | ⭐⭐ Easy | Fast global delivery |
Today: We'll use Netlify Drop - literally drag and drop!
🛠️ Hands-On: Deploy with Netlify Drop
Step 1: Prepare Your Files
- Create a new folder on your computer (e.g., "my-website")
- Put your HTML file inside and rename it to
index.html - Add any images you're using to the same folder
📁 Your folder should look like:
my-website/
  ├── index.html
└── (any images)Step 2: Visit Netlify Drop
- Go to app.netlify.com/drop
- You'll see a big drop zone that says "Drag and drop your site folder here"
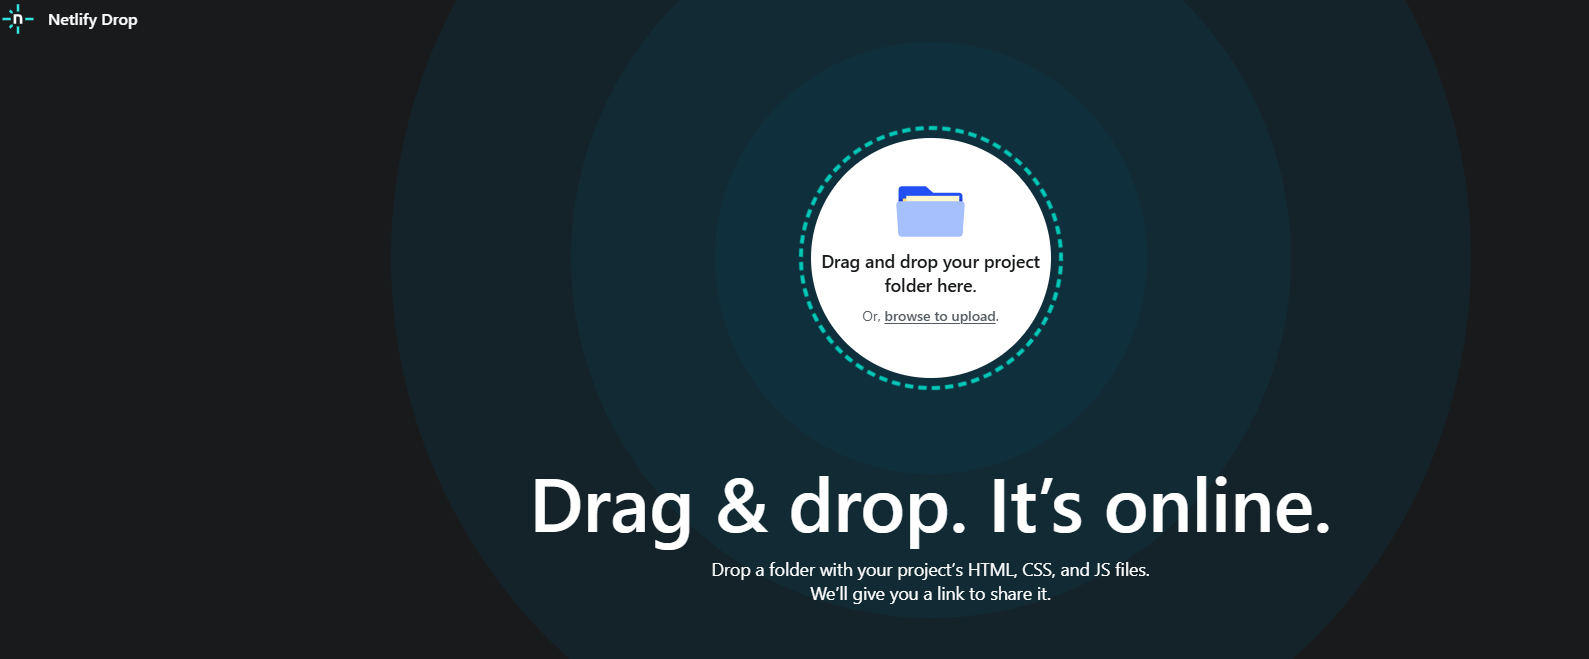
Step 3: Drag, Drop, Done! 🎉
- Drag your entire folder (not just the HTML file) onto the drop zone
- Wait a few seconds... ⏳
- You get a live URL! Something like:
random-name-12345.netlify.app
🎊 That's it! Your page is now live on the internet!
Share the URL with family and friends!
Making Updates to Your Site
Need to change something?
- Create a free Netlify account (to "claim" your site)
- Edit your files locally
- Drag and drop the folder again
- Your URL stays the same, but content updates!
Pro Tip: With an account, you can also set a custom site name like:
your-name.netlify.app
Alternative: GitHub Pages (Preview)
Another popular free option (we'll learn more in Session 5-6)
Pros
- Free forever
- Version control built-in
- Custom domains supported
- Industry standard
Cons (for beginners)
- Requires GitHub account
- Need to learn Git basics
- Slightly more setup
Perfect to learn once you're comfortable with HTML/CSS!
Deployment Troubleshooting
| Problem | Likely Cause | Solution |
|---|---|---|
| Page not found (404) | File not named index.html | Rename your main file to index.html |
| Images not showing | Wrong file path or missing file | Put images in same folder, use relative paths |
| Styles look different | CSS file not uploaded | Include all CSS files in folder |
| Old version showing | Browser cache | Hard refresh (Ctrl+Shift+R) |
Still stuck? Ask AI: "My deployed website shows [problem]. Here's my folder structure: [describe]. What's wrong?"
What We Learned Today
- ✅ HTML is the structure/skeleton of a webpage
- ✅ You describe content types (titles, text, lists, images, links)
- ✅ AI writes the code - you focus on what you want!
- ✅ Ask for changes by describing what's wrong
- ✅ Deploy your page so anyone can see it!
🎯 The Vibe Coding Way: Describe → AI Creates → You Review → Repeat!
Practice Before Next Session
Mini-Project: Build a page about your favorite hobby
Include: headings, paragraphs, images, links, and lists
🚀 Bonus: Deploy it with Netlify Drop and share the URL!
Optional Challenges:
- Create a multi-page site (2-3 HTML files linked together)
- Try using semantic tags (<header>, <main>, <footer>)
- Add more creative content (poems, jokes, stories)
- Share your deployed URL with a friend or family member!
Next Session Preview
Session 03: CSS Basics with AI Guidance
We'll learn how to make our HTML pages beautiful!
- Colors, fonts, spacing, layouts
- CSS syntax and selectors
- Using AI to style your pages
- Build a styled portfolio page
From structure to style! 🎨
Questions?
Let's discuss anything from today's session
Remember:
HTML is just structured text.
You're already 90% of the way there! 🎉